This originally appeared on the ACRL TechConnect blog.
I started working on this project yesterday, but I wanted to write it up as quickly as possible so that I could see how others are approaching this issue. First of all, I should say that this approach was inspired by this article in the Code4Lib Journal: “Using XSLT and Google Scripts to Streamline Populating an Institutional Repository” by Stephen X. Flynn, Catalina Oyler, Marsha Miles.
The problem I had was a faculty member who sent a CV to a liaison for adding the items to the repository, but whose citations were not showing up in the citation databases–and I now work at an institution with all of the resources I need for this. So I wanted to go the other way, and start with the CV and turn that into something that I could use to query SHERPA/RoMEO.
It occurred to me that the best tool for this might be Google Refine (now OpenRefine, I guess), which I’ve always wanted to play around with. I am sure there are lots of other ways to do this, but I found this pretty easy to get set up. Here’s the approach I’m taking, with a version of my own CV.
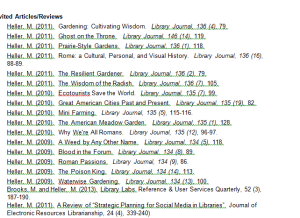
- Start with a CV, and identify the information you want–you could copy the whole thing or use screen scraping or what have you, but most people’s CVs are about 20 pages long and you only care about 1 or 2 pages of journal articles.
- Copy this into a text editor to remove weird formatting or spacing. You want to have each citation in its own line, so if you had a CV with hanging indents or similar you would have to remove those.
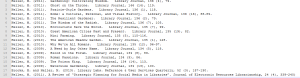
- Now (assuming you’ve installed and opened Google Refine), either import this text file, or copy in the text. Import it as line based text file, and don’t select anything else.
- Click on Create Project>>, and it will bring it into Google Refine. Note that each line from the text file has become a row in the set of data, but now you have to turn it into something useful.
- My tactic was to separate the author, date, title, journal title, and other bibliographic information into their own columns. The journal title is the only one that really matters for these purposes, but of course you want to hang on to all the information. There are probably any number of ways to accomplish this, but since citations all have a standard structure, it’s really easy to exploit that to make columns. The citations above are in APA style, and since I started with social work faculty to test this out, that’s what I am starting with, but I will adjust for Chicago or MLA in the future. Taking a look at one citation as example we see the following:
Heller, M. (2011). A Review of “Strategic Planning for Social Media in Libraries”. Journal of Electronic Resources Librarianship, 24 (4), 339-240)
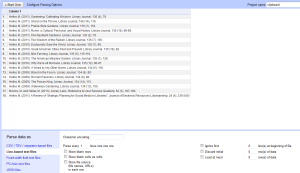
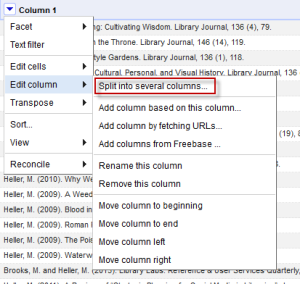
Note that we always have a space after the name, an open parentheses, the date, a closed parentheses, and a period followed by a space (I’ve colored all the punctuation we want blue). So I can use this information to split the columns. To do so, select “Split into several columns” from the Edit Column menu.
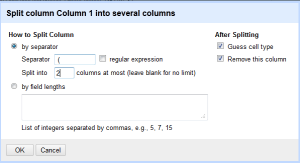
Then in the menu, type in the separator you want to use, which in this case is space open parentheses. Split into two columns, and leave the rest alone. Note that you can also put a regular expression in here if necessary. Since dates are always the same length you could get away with field lengths, but this way works fine.
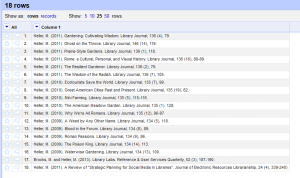
After this, you will end up with the following change to your data:
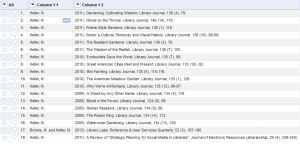
Now the author is in the first column, and the opening parenthesis is gone. - Following along with the same rationale for each additional field and renaming the columns we end up with (cooking show style) the following:
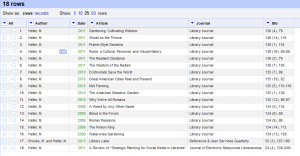 Each piece of information is in its own column so we can really start to do something with it.
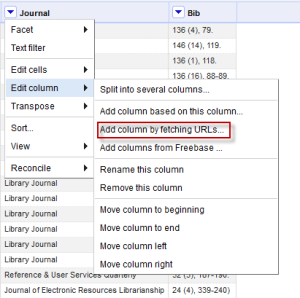
 - I am sure there’s a better way to do this, but my next step was to use the journal title as the query term to the SHERPA/RoMEO API call. This was super easy once I watched the data augmentation screencast; there is documentation here as well. Open up the following option from the edit column menu:
You get a box to fill in the information about your API call. You have all kinds of options, but all you really need to do for this is format your URL in the way required by SHERPA/RoMEO. You should get an API key, and can read all about this in the article I linked to above. There are probably several ways to do this, but I found that what I have below works really well. Note that it will give you a preview to see if the URL is formatted in the way you expect. Give your column a name, and set the Throttle delay. I found 1000 worked fine.
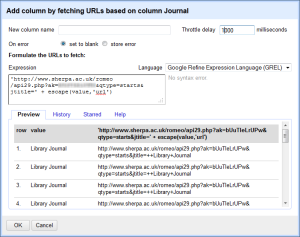 In a copy and pastable format, here’s what I have in the box:
'http://www.sherpa.ac.uk/romeo/api29.php?ak=[YOUR API KEY HERE]&qtype=starts&jtitle=' + escape(value,'url') - Now it will run the query and send back a column of XML that looks like this:
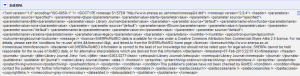
- From this you can extract anything you want, but in my case I want to quickly get the pre and post-archiving allowances, plus any conditions. This took me awhile to figure out, but you can use the Googe Refine Expression Language parseHtml function to work on this. Click on Add column based on this column from the Edit Column menu, and you will get a menu to fill in an expression to do something to your data. After a bit of trial and error, I decided the following makes the most sense. This grabs the text out between the <prearchiving> element in the XML and shows you the text. You can see from the preview that you are getting the right information. Do the same thing for post-archiving or any other columns you want to isolate. The code you want is
value.parseHtml().select("elementname")

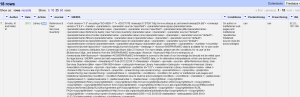
Conditions are a little different, since there are multiple conditions for each journal. In that case, you would use the following syntax (after join you can put whatever separator you want):forEach(value.parseHtml().select("condition"),v,v.htmlText()).join(". ")" - Now you have your data neatly structured and know the conditions for archiving, hooray! Again, cooking show style, here’s what you end up with. You can certainly remove the SHERPA/RoMEO column at this point, and export the data as Excel or whatever format you want it in.
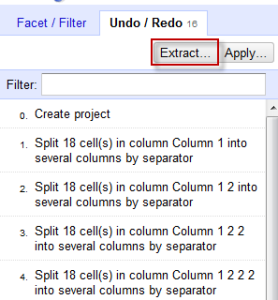
- BUT WAIT, IT GETS BETTER. So that was a lot of work to do all that moving and renaming. Now you can save this for the future. Click on Undo/Redo and then the Extract option.
Make sure to unclick any mistakes you made! I entered the information wrong the first time for the API call, so that added an unnecessary step. Copy and paste the JSON into a text editor and save for later.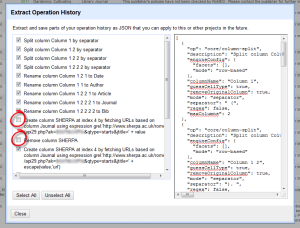
- From now on when you have your CV data, you can click on the Undo/Redo tab and then choose Apply. It will run through the steps for you and automatically spit out your nicely formatted and researched publications. Well… realistically the first time it will spit out something with multiple errors, and you will see all the typos that are messing up your plan. But since the entire program is built to clean up messy data, you’re all set on that end. Here’s the APA format I described above for you to copy and paste if you like–make sure to fill in your API key: cvomatic
I hope this is useful to some people. I know even in this protean form this procedure will save me a ton of time and allow library liaisons to concentrate on outreach to faculty rather than look up a ton of things in a database. Let me know if you are doing something similar and the way you are doing it.